Before starting, we recommend reading the information included in the links below to help you get familiar with the HTC VIVE Focus 3 headset -
About the VIVE Focus 3 Headset
Preparing the VR headset for use:
In order to make your experience with the Traveling VR kit as smooth as possible, we have configured the headset in a way that should provide for quick and easy setup. Your Traveling VR Kit should come fully charged, but in the event it has lost power, scroll down this page for further instructions.
- Power on your HTC VIVE Focus 3 by pressing the power Button located on the back of the headset for approximately 3 seconds
- Once powered on, the headset should prompt you to set up your play area
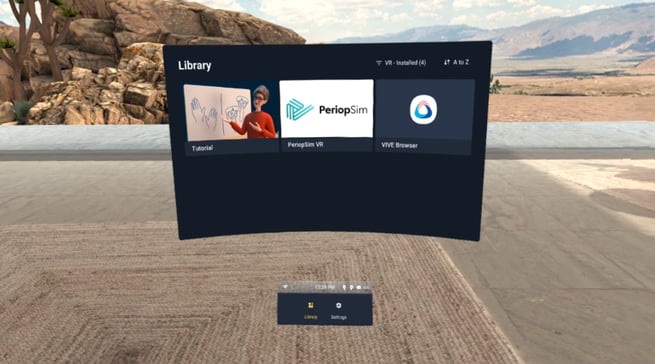
- Once you have completed setting up your room boundary, the headset should automatically place you in the HTC Lobby (see image below)
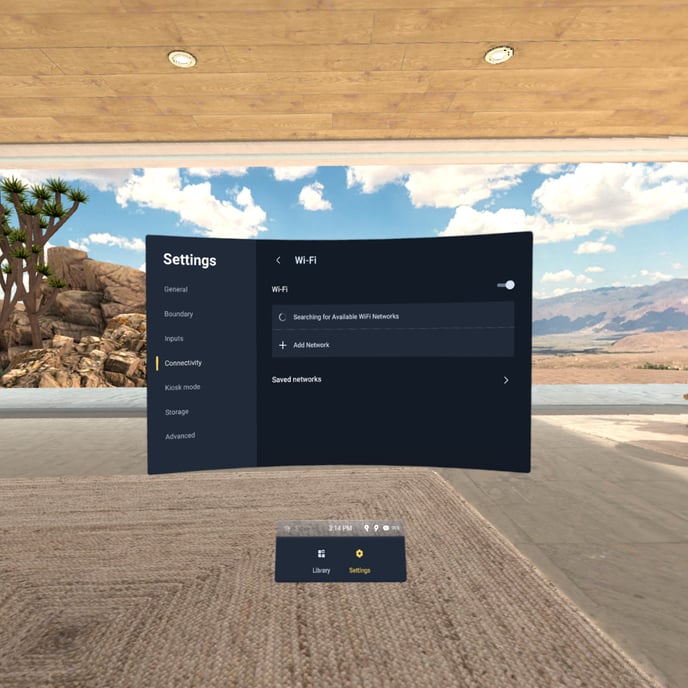
- Next, connect to your local Wi-Fi network by going to Settings, and selecting Connectivity > Wi-Fi and then connect to your local network. You can also access Wi-Fi settings by pressing the VIVE button on the right controller, and then select More > Wi-Fi. Please Note: If you are presented with a captive portal screen while trying to connect to a public-access Wi-Fi network, open the VIVE web browser. The VIVE web browser should open up the screen required by the guest network. Proceed to login to your Wi-Fi network
- Once connected to your local WiFi network, exit out the settings menu to bring back the HTC Lobby. In the HTC Library (see below), click PeriopSim VR where you will enter your PeriopSim account information (email and password)
If the headset or controllers requires charging, follow these instructions:
Charging the controllers:
- The controllers use rechargeable batteries. You will want to charge them periodically using the splitter cable.
- Charge the controllers by plugging them into the headset using the included splitter cable
Important: The headset must be turned on to charge the controllers - It is recommended to connect the headset to a power outlet when you're using the headset to charge the controllers
- You can also charge the controllers with your own USB charging block. The charger should have an output of at least 10 watts. Important: Please note if trying to charge your controllers through a USB port which is not a dedicated charging block the amount of time needed for a full charge will drastically be increased. It is recommended to use a dedicated USB charging block
- To verify the controllers are charging, ensure that you see the orange LED indicator light active on both controllers

Charging the headset:
- Charge the headset with the included AC adapter by connecting the AC adapter to a power outlet, and then connecting it to the headset via the port on the back of the headset above the LED indicator
Important: Charging the headset while in use is not recommended - You can charge the battery separately with the same adapter and port
When finished with your session, follow these instructions to power down the VR headset and controllers:
Powering down and turning off the controllers:
-
Power down the controllers by pressing and holding down the MENU button on the left controller and the VIVE button on the right controller for 2 seconds each. Verify the controllers have been powered by the absence of vibration or lights when picking up.
Turning off and powering down the headset:
- While wearing the headset, power down the headset by pressing and holding the headset button for 3 seconds to shut down the headset. The headset button can be found on the front left side of the headset.